Photoshop can feel overwhelming at first. Dozens of panels, hundreds of tools, and menus that seem to hide what you actually need. In reality, most beginners only need a small set of basic Photoshop skills to start producing clean, usable edits. Once those basic Photoshop skills are in place, the rest of the software becomes far less intimidating.
The truth is that Photoshop basics are not about memorizing tools. They are about understanding a simple workflow: open a file, make controlled changes, keep the original safe, and export the right version for sharing. Many frustrations come from small mistakes – saving over the only copy, exporting the wrong format, or losing track of where files go.
A beginner does not need every tool in the interface. What matters is learning a repeatable process that produces predictable results. With a few Adobe Photoshop basics, you can crop images, correct lighting, remove small distractions, and prepare files that look clean on social media or websites.
If you want to check your level later, Testizer offers a quick online skills check with results sent by email; a certificate is optional if you need proof.
Before you chase effects, learn the small workflow that makes edits predictable. These Photoshop essentials are not flashy, but they prevent the most common beginner mistakes: overwriting files, losing quality, and getting stuck with edits you cannot undo cleanly. Early progress comes from four habits – opening the right file, saving smart versions, using undo/history with purpose, and keeping changes reversible. Once that feels natural, learning new tools becomes easier because you are not fighting your own process. The first goal is simple: consistent output that looks intentional.
Your first-week wins:
Good Adobe Photoshop basics start with a workspace that stays consistent. It is not about looks – it is about speed, fewer misclicks, and knowing where to check when something changes. For beginners, panels act like a control center. If you keep three of them visible and predictable, editing stops feeling chaotic: “Layers” shows what you are actually changing, “Properties/Adjustments” lets you fine-tune edits without hunting, and “History” gives you a safe way back when an experiment goes sideways. A stable setup also prevents that familiar moment when a panel disappears and you lose time trying to rebuild your screen instead of editing.
|
Panel |
What it controls |
Beginner habit |
|
Layers |
What changes apply to |
Name layers early |
|
Properties/Adjustments |
Quick control of edits |
Tweak one slider at a time |
|
History |
Step-back safety |
Snapshot before risky edits |
Before editing, reset to a clean workspace and pin the panels you use every session.
In Photoshop basics, file format is part of the edit. A PSD is your editable master: it keeps layers, masks, and adjustments intact. Exports are for sharing, uploading, or printing. Many beginners lose time by overwriting the only copy or exporting the wrong format and then wondering why quality drops or transparency disappears. Pixel size and resolution also depend on where the image will live – a web post needs clean dimensions, while print needs higher resolution.
Quick rules to stay safe:
Example: keep “portrait_edit_master.psd” and export “portrait_1080px.jpg”.
When you start learning Photoshop, it can be useful to check your progress with a structured task set. A Photoshop skills test typically focuses on practical actions rather than theory – opening files, working with layers, exporting images, and making small corrections.
If you want a quick benchmark, Testizer offers an online Photoshop skills test that can be completed in a short session. The results are sent by email, so you can see which tasks already feel comfortable and which areas need more practice.

Photoshop essentials for clean edits come down to restraint. Most “professional” results are not special effects – they are correct framing, a few targeted fixes, and a file that stays organized. If you keep your edits simple and reversible, you can work faster and avoid the common beginner trap of repainting the same image over and over after one mistake. Think in small decisions: one change at a time, clearly separated, with an easy way back.
Clean edit rule set:
One of the most useful basic Photoshop skills is learning to fix a photo’s structure before you touch color or retouching. Cropping is both composition and problem-solving: it removes distractions, improves balance, and helps your subject read clearly. Straightening matters more than people expect – a slightly tilted horizon or leaning verticals makes an image feel wrong even when the lighting is fine. Resizing is not taste-based; it is platform-based, so your image looks sharp and loads correctly.
Micro checklist:
Practical outcome: turn a wide classroom photo into a clean profile banner without stretching faces.
The core Photoshop essentials idea is simple: layers are separate decisions, and masks decide where those decisions show up. The biggest beginner upgrade is stopping the habit of erasing pixels. When you work with masks, you can hide and reveal, refine edges, and change your mind later without rebuilding the edit. Selections will feel rough at first; cleaner edges come from zooming in, working slowly, and not trying to perfect everything in one pass.
Keep it simple:
Photoshop essentials for color and light are about making the photo look the way it likely felt in real life. Clean corrections should read as natural, not as an obvious edit. Beginners usually run into trouble by pushing sliders until the image looks crunchy, neon, or flat. The easiest way to stay on track is to compare: glance at the original often, then step back to see whether your change still feels believable.
If you edit a set of images (for a class project, a feed, or a small portfolio), aim for consistency. Similar lighting and skin tones across multiple photos looks more professional than one “perfect” image next to five that don’t match.
In Adobe Photoshop basics, Levels and Curves solve different problems. “Levels” is the fast way to set your shadows and highlights by nudging the black and white points so the image has structure again. “Curves” is slower but more precise, especially when you want to lift midtones without blowing out highlights. White balance is the quiet hero here: it’s often the difference between natural skin and a greenish or bluish cast that makes a photo feel unhealthy.
A good beginner rule is to make a small move, then look at the brightest and darkest areas. If highlights lose detail or shadows turn to solid blocks, dial it back.
|
Tool |
Best for |
Beginner safe move |
|
Levels |
Quick contrast |
Move endpoints slightly |
|
Curves |
Precision |
Gentle S-curve |
|
White balance |
Color cast |
Neutralize whites |
One Photoshop basics habit that pays off immediately is using adjustment layers instead of editing pixels directly. You keep your original intact, and every tweak stays reversible. That matters when you’re learning, because your first version rarely ends up being your final version. It also helps you build edits in small steps: a mild exposure lift, a slight color correction, then a tiny contrast boost – rather than one heavy change that looks forced.
Retouching is about removing distractions, not rewriting a person or a product. Strong basic Photoshop skills show up in the small decisions: keeping pores, fabric grain, and natural shadows intact. The most common beginner mistake is chasing a perfectly smooth surface, then wondering why the image looks flat. Work close-in to target flaws, but zoom out often to judge the overall feel.
Retouching guardrails:
Spot Healing is your quick fix for tiny issues (dust, small blemishes). Clone Stamp is slower, but it gives control when backgrounds are textured or edges matter. Content-Aware tools help with larger removals, yet they can invent odd patterns if the surrounding area is busy. For Photoshop essentials, the safest habit is simple: retouch on a separate layer so you can reduce strength later instead of starting over.
Quick cleanup checklist
Practical outcome: remove a dust spot on a product photo without smearing the texture.
Once you begin practicing regularly, a simple way to measure improvement is to repeat the same set of tasks under time limits. A structured Photoshop skills test helps identify whether you can complete common edits consistently: cropping, working with layers, correcting color, and exporting the final file.
Platforms such as Testizer include short Photoshop assessments designed around real editing steps. You can complete the test online, review the result report by email, and optionally obtain a certificate if you need shareable proof of your digital editing skills.
Photoshop fundamentals build in layers: a steady workspace and the right file formats come first, then clean edits, controlled color, and careful retouching. Once that stack is in place, the work stops feeling random and starts feeling repeatable. The fastest progress rarely comes from adding new tools every day. It comes from running the same small workflow on different images until the steps feel automatic. If you want one anchor phrase to remember, make it Photoshop basics: keep an editable master, make changes in small passes, and export only when you’re done.
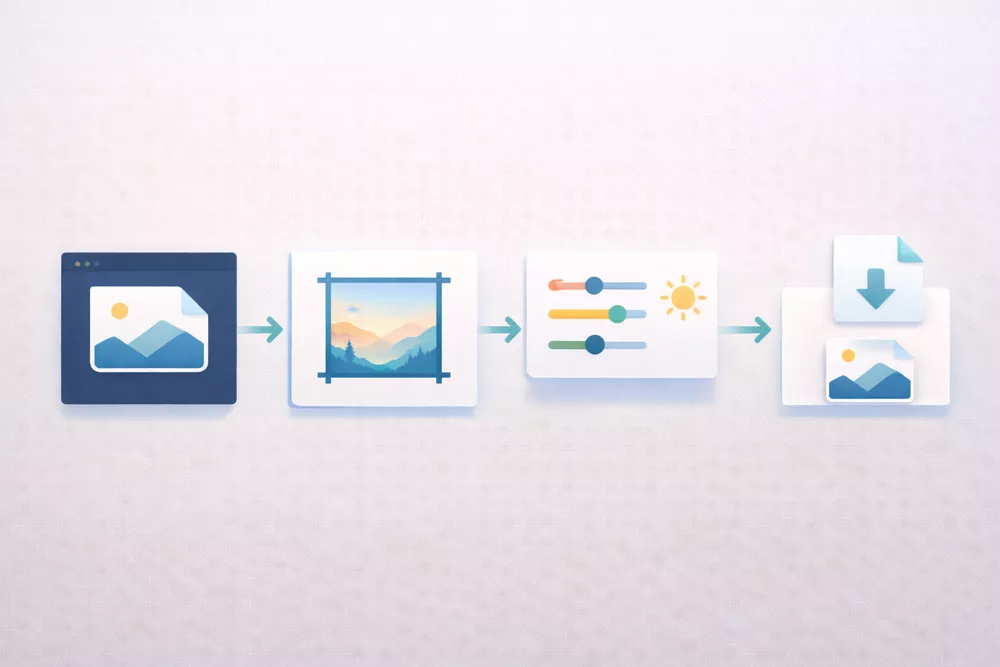
Start with a simple workflow order: open safely, save a master file, make reversible edits, then export a shareable copy. This prevents the two biggest beginner problems: losing quality and overwriting your work. When the order is stable, tools make more sense because you’re using them toward an outcome. Practical step: do a 10-minute routine on one photo–open, duplicate, crop, export.
No – your mouse or trackpad is enough for the fundamentals, especially for cropping, simple retouching, and learning how selections and masks behave. A tablet helps later when you want smoother brush control for detailed dodging, burning, or complex masking. If you can make clean edges with a mouse, your technique will transfer easily. Practical step: practice selections and masks on a simple object photo with clear edges.
Layers hold your edits as separate decisions, while masks control where those decisions show up. Think of the layer as the change itself, and the mask as the on/off map that reveals or hides it in specific areas. This is why masks beat erasing: you can refine the edge instead of undoing the whole edit. Practical step: create a brightness adjustment layer and mask it to one area only.
It depends on your goal, but the basics can become usable quickly if you repeat the same tasks instead of jumping between features. A week of consistent practice often gets you confident enough for school projects, content posts, and simple cleanups, while advanced work takes longer. What matters most is repetition with small variations. Practical step: follow a 7-day plan – crop, use an adjustment layer, and export a web copy every day.